page
1 2 3 4
5 6
Updated:
May 31, 2004
BikeTech Page 2
Wind screen alternatives
Solution 1: The Rando Mega
screen
Rando
has made a screen from a barn door Slipstream screen. This huge screen solves
all problems, so check out the message board for Rando's pictures and story
(July 15, 2002). His screen measures just over 50 cm (20") tank-to-top
and should therefore be the right solution for me as well. Problem is how to
get a Slipstreamer screen (the right type of screen) in Europe in one week (I'll
be going away for vacation with the thumper for the As
the crow flies trip). So the answer lies in trying Trevor's adjustable screen.
Solution 2: The Clever Trevor
Screen Solution
I name it after the inventor of this solution. Have a look at Trevor's
site with nice shots of his adjustable screen.
It took me a while to find the right
hardware store for the drawer brackets. Most of them had newer versions based
on a tube system. I started to collect all applicable bracket types until I
found window brackets that would probably fit Trevor's description.
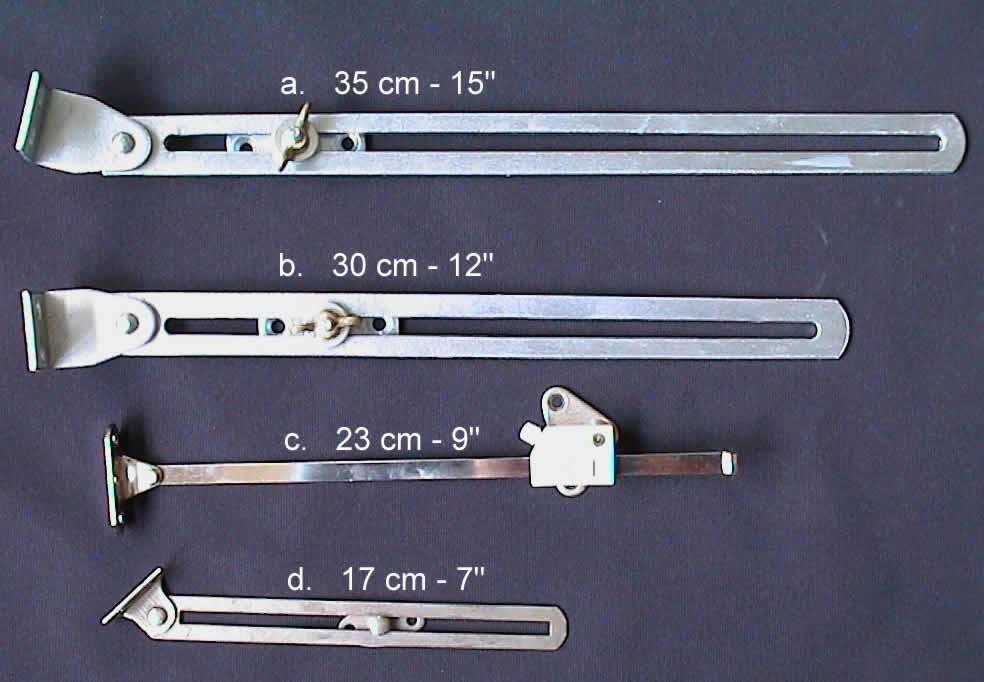 The
top two are window brackets (2 mm thick), the lower two are brackets for cabinets.
Looking at Trevor's site he used a longer version of the thinner "d"
type bracket. My preference was to use the "c" type (also 2mm thick),
because this is a single rod of steel and has a nice clamping system. The clamp,
however, could not be fully fixed in place so I'll defer this system for a next
round. The window brackets "a" and "b" were a bit too large,
but had the advantage of being very strong and reasonably weather proof. A nice
extra was that they already have all the necessary fixing material, including
the wing nut and nylon washers. The price for a pair of nr. "b" was
a mere $10. The lowest bracket is used for cabinets, has thickness of 1.5mm
and is less weather-resistant, so I opted for bracket "b".
The
top two are window brackets (2 mm thick), the lower two are brackets for cabinets.
Looking at Trevor's site he used a longer version of the thinner "d"
type bracket. My preference was to use the "c" type (also 2mm thick),
because this is a single rod of steel and has a nice clamping system. The clamp,
however, could not be fully fixed in place so I'll defer this system for a next
round. The window brackets "a" and "b" were a bit too large,
but had the advantage of being very strong and reasonably weather proof. A nice
extra was that they already have all the necessary fixing material, including
the wing nut and nylon washers. The price for a pair of nr. "b" was
a mere $10. The lowest bracket is used for cabinets, has thickness of 1.5mm
and is less weather-resistant, so I opted for bracket "b".
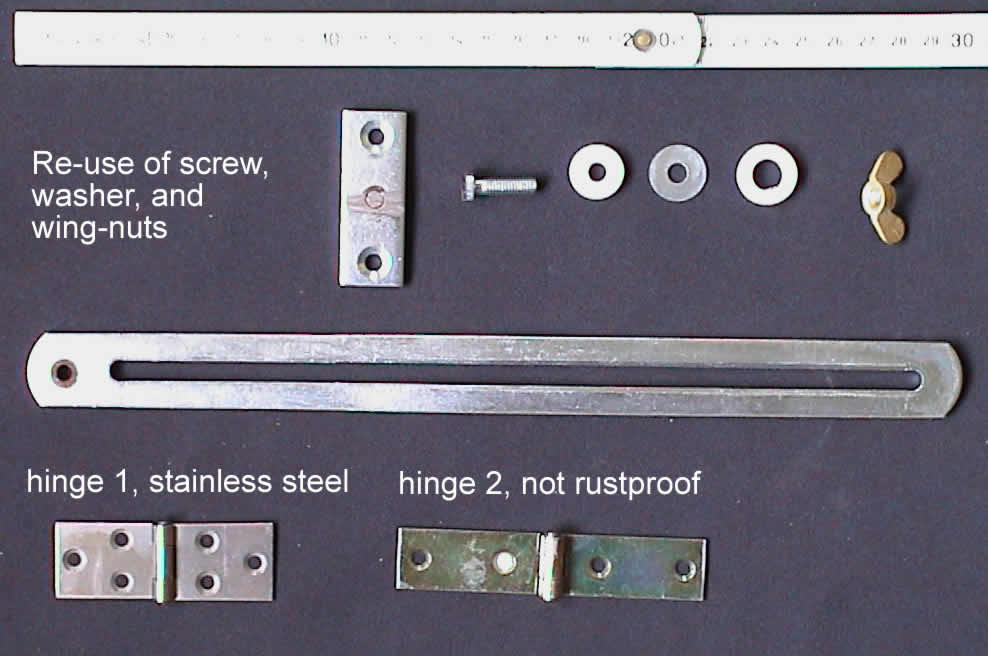
The work to transform two of these brackets into the components to mount on
the bike was no more than an hour work, and basically consisted of sawing the
M6 screw part from the bracket (see top row) and making the hole on the left
in the bracket (2nd row) a bit wider. Since my screen needed to be about 5 cm
(2") higher than Trevor's screen I added a hinge to the lower part of the
screen. I bought two hinges and preferred the right one, but used the left one
for this first prototype because this one was made of stainless steel. Price
for the hinge: $1.50. An additional advantage of the hinge is that it avoids
pressure on the screen when you adjust the height.
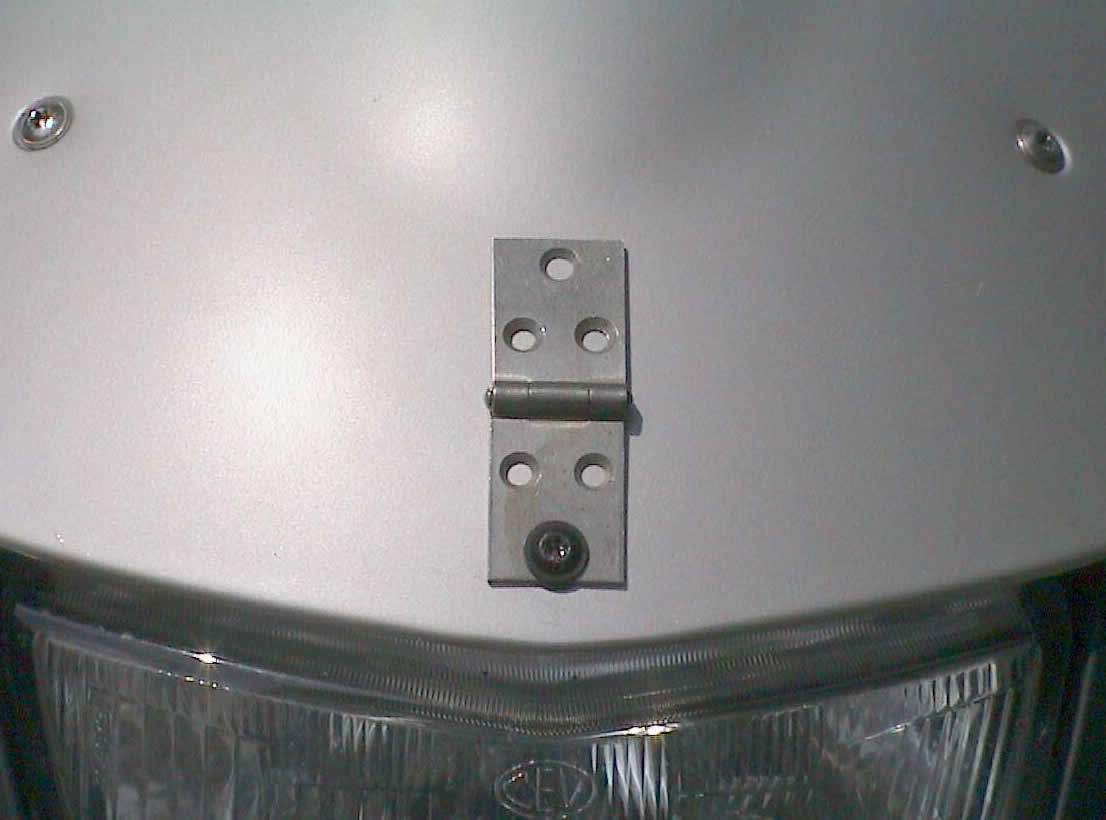
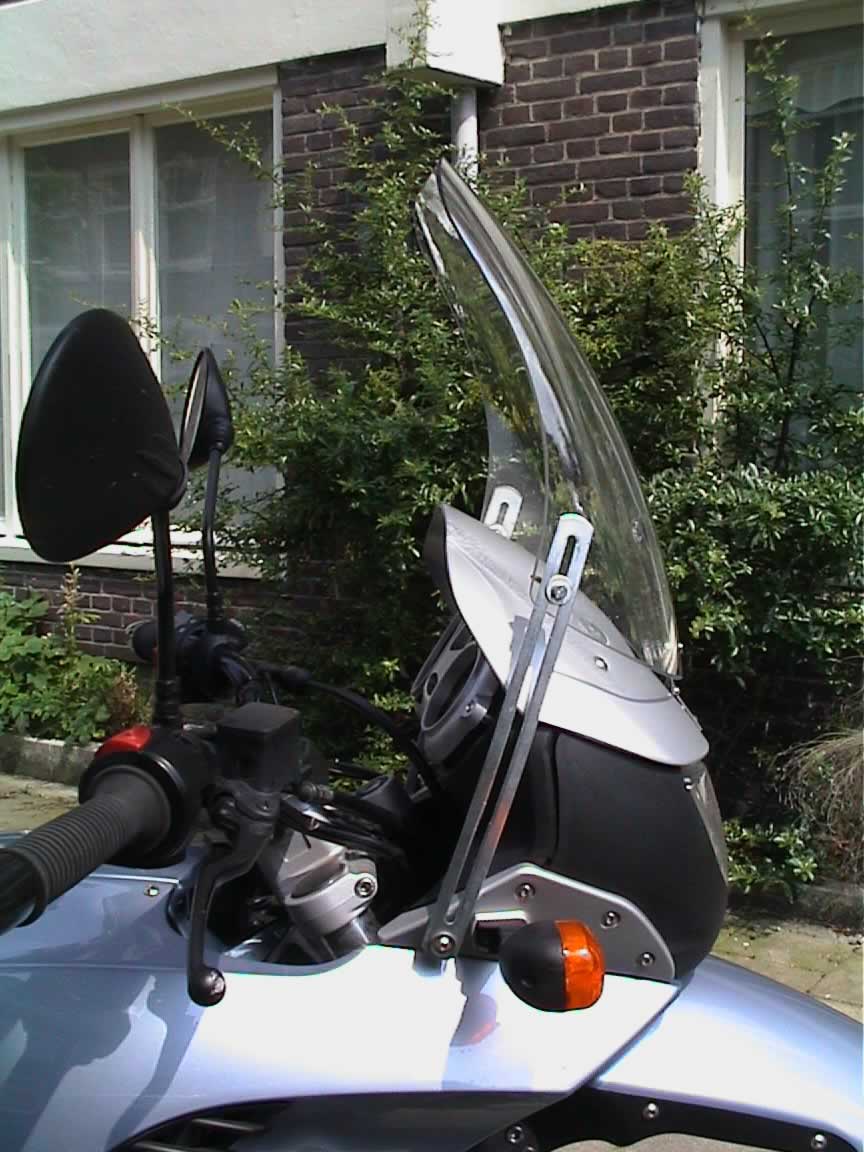
The brackets were a bit on the long
side (30 cm - 12"), which I solved by mounting them on the 4th screw into
the silver plastic moulding of the 650GS. I found this position a bit easier
as it is behind the turn-light and therefore easier to mount. Just like Trevor
I used a 1.5 cm (1/2") spacer o fit the bracket onto the screws and re-used
the two tall screws from the screen to mount these brackets. The hinge I mounted
to the headlight structure using the third screw from the screen. Besides the
wing nuts which came with the brackets, I therefore only needed to add one M5
screw to connect the hinge onto the screen. This prototype still has a basic
screw for the top mounting of the hinge. I plan to use some nicer looking screws
in a next version.
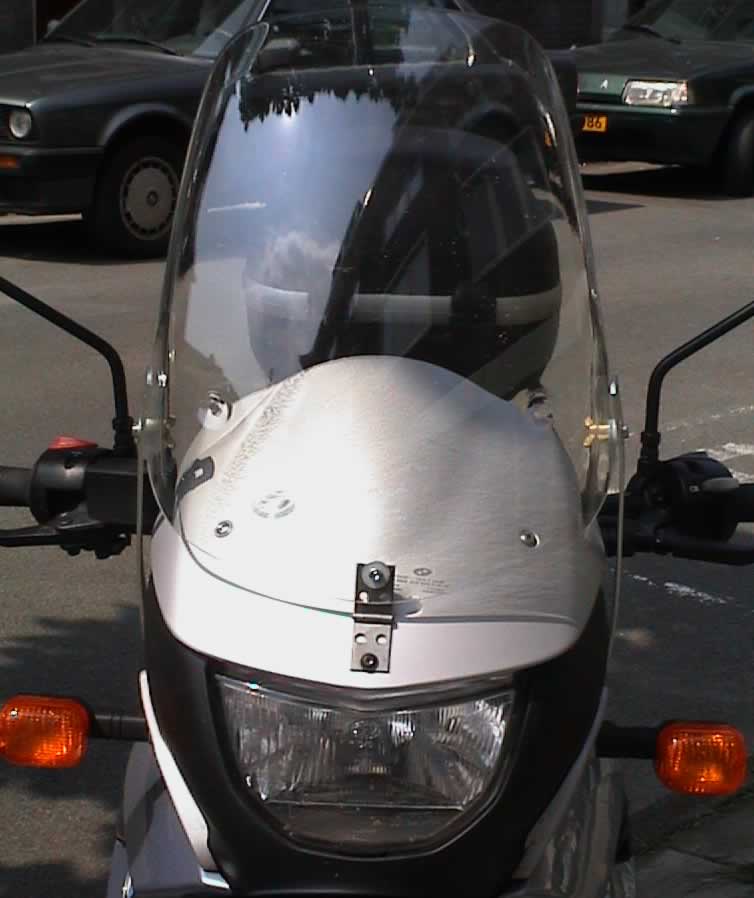
Note that I mounted the tall screen on top of the stock screen. First of all
because I found this better looking, and secondly because the stock screen reduces
the opening between the tall screen and the lamp house and therefore reduces
false winds. Worst case: If my adjustable screen crashes for some reason during
my long trip I always have the stock screen to continue.
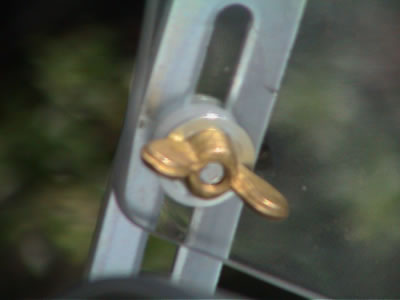
Below you'll see the low mount, with
a cone-shaped plastic washer on the inside (left) that sells as a small doorstop.
The rubber washer on the right side is a washer that is used in faucets. Low
in price and very good quality rubber. The middle picture shows the stock screen
with hinge, and the right picture shows the wingnut of the top mount on the
inside of the screen. See release 2 version on next page for an explanation.

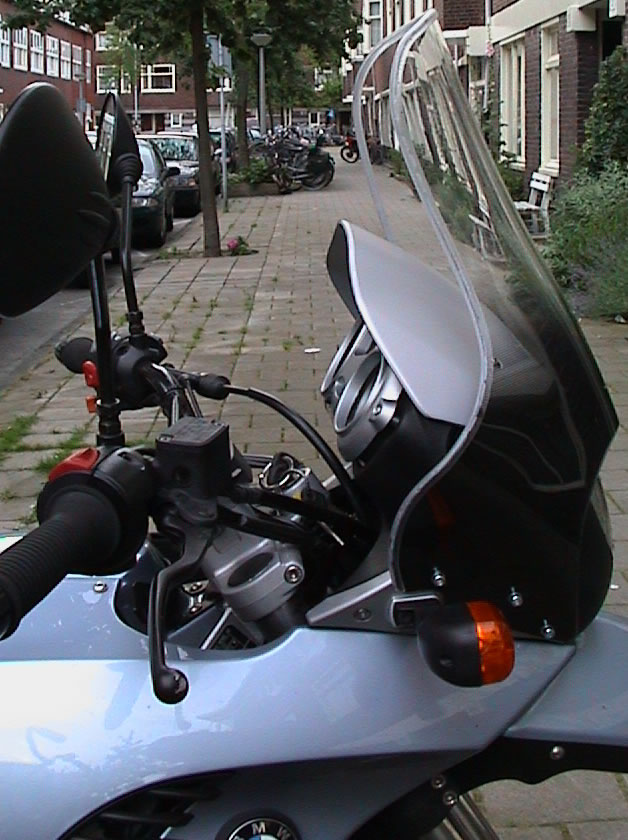
A 6mm hole at the corner of the screen
is easily drilled in the LEXAN. The nylon washers that came with the window
brackets fitted perfectly. I positioned the wing nut on the inside of the screen,
mainly for cosmetic purposes. I may eventually replace the wing nuts by regular
screws. The brackets needed a little bending by hand to fit the curve of the
screen. The result is given in the pics below. Total amount of work was about
3 hours, most of which was spent in explaining to other folks passing by what
I was doing.
The two pics on the left are the
"Hinged Trevor" screen prototype. The picture next to that is the
Ermax screen and the one on the right is the BMW tall screen (modified with
spacers). I adapted the size of the pictures somewhat so that the "Mickey
Mouse Mirror Ears" have about the same size. This shows the substantial
difference between the adjustable screen and the two other options.
Future versions will have a prettier
hinge, of course. That is a matter of finding a stainless steel hinge with only
a single hole and which then will be shaped to follow the curve of the screen.
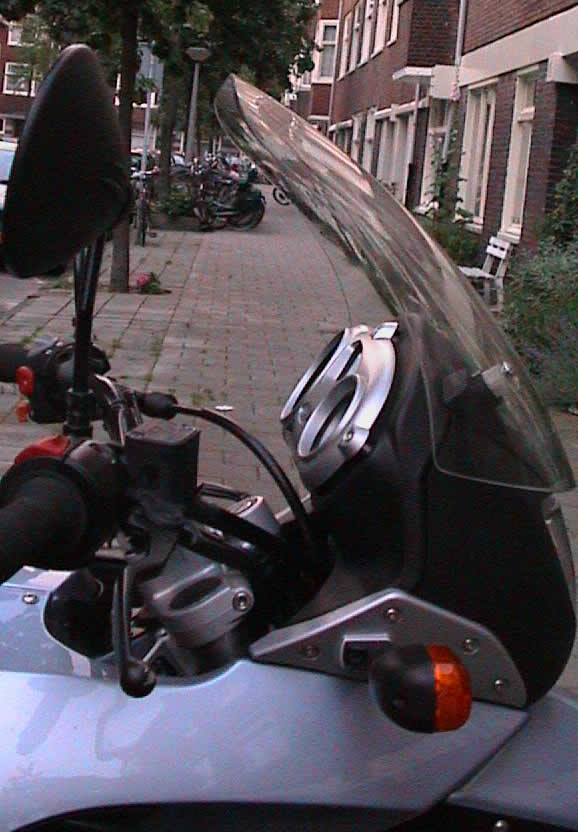
Prototype Driving Test
A noticeable reduction in wind at helmet level! The tank-to-top distance of
this hinged version of the Trevor screen measures 51 cm (20.5"").
I can drive 100 km/h (60 mph) without earplugs and with the screen of my helmet
a little open. Wind hits me at the helmet just above the forehead and has much
less power. This does not mean that there is no wind at all, but it is sufficiently
less to take short trips (30 minutes) on the highway at this speed without ear
plugs. With earplugs, speeds up to 130 km (80 mph) can be driven without too
much buffeting. Because the upright screen is a bit further away from you there
will be some buffeting, but the quantity is tolerable and much less than with
the Ermax screen. The opening between the stock screen and the tall screen does
not lead to false winds from below. In its highest position, the screen is just
at eye level. I found that having the dark edge of the screen at eye level disturbs
my vision on the highway and have therefore lowered it about an inch.
Altogether, Trevor's adjustable screen
is a success! The modification is very inexpensive and can be done with
basic tools and without being an experienced handyman. The adjustability of
the screen will allow you to lower it quickly when you're planning to go off-road
and want to get rid of the screen. You should not expect miracles from this
modification, but the improvement is significant enough to give it a try when
you're tall and like to ride over 100 km/60 mph with some more comfort. Worst
that could happen is that you have wasted a few dollars in brackets and end
up with two little extra holes on the side of your screen.
What's Next?
Improvements:
- Make the hinge better looking. I already closed the other screwholes with
polyester and will paint it light gray/silver and see if that looks better.
- Replace the screws in the top mount of the brackets by short slotted screws
that fit the opening in the brackets. This means only the wing nuts need to
tightened on the inside of the screen.
- Have both the brackets and the hinge galvenised for permanent rust protection.
This is an inexpensive job, but usually has a return time of a week, which I
do not have presently.
- Now that this works for the tall BMW screen I can try to do something similar
with the Ermax screen that I now have as spare.
See the Prototype Release 2 on the
Next Page>>>>>>